Screaming Frog SEO Spider is a powerful tool for website analysis, providing valuable insights for search engine optimization. This guide is tailored for beginners, offering step-by-step instructions and practical examples to help you navigate Screaming Frog SEO Spider and leverage its features for effective SEO management.
Step 1: Download and Install Screaming Frog SEO Spider:
Begin by downloading Screaming Frog SEO Spider from the official website (https://www.screamingfrog.co.uk/seo-spider/). Install the application on your computer following the on-screen instructions.
Step 2: Launch the SEO Spider and Enter Website URL:
After installation, launch Screaming Frog SEO Spider. Enter the URL of the website you want to analyze in the “Enter URL to Spider” field and click “Start.”
Example:
- Enter “https://www.example.com” in the URL field.
- Click “Start” to initiate the crawling process.
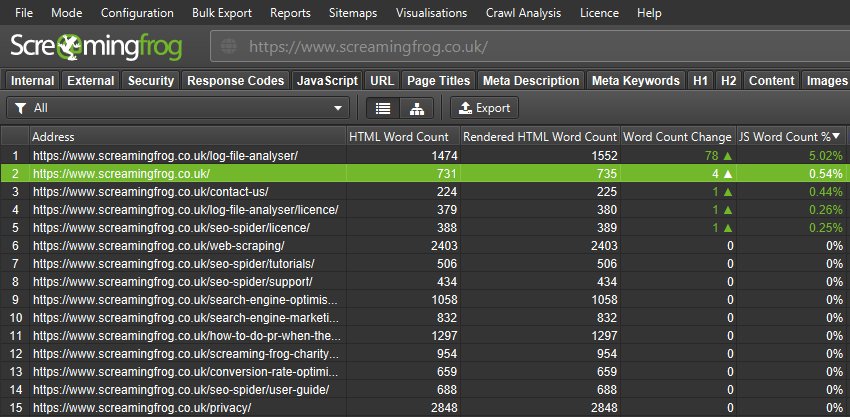
Step 3: Understand Crawling Results:
Wait for the crawling process to complete. Once finished, explore the different tabs to understand the results, including “Internal,” “External,” “Images,” and more. Each tab provides insights into various aspects of your website.
Step 4: Analyzing Internal Links:
Navigate to the “Internal” tab to analyze internal links. Identify broken links, redirects, and anchor text distribution.
Example:
- Go to the “Internal” tab.
- Identify broken links and check anchor text distribution.
Step 5: Reviewing External Links:
Visit the “External” tab to examine external links pointing to your site. Assess the quality of backlinks and anchor text.
Example:
- Access the “External” tab.
- Evaluate the quality and relevance of external backlinks.
Step 6: Analyzing Images for SEO:
Explore the “Images” tab to analyze images on your website. Check for missing alt text, large file sizes, and other image-related SEO factors.
Example:
- Go to the “Images” tab.
- Identify images with missing alt text and optimize as needed.
Step 7: Utilizing Custom Extraction:
Use the “Custom” tab for advanced analysis. Extract specific data like meta tags, headings, or custom elements.
Example:
- Access the “Custom” tab.
- Set up custom extraction rules for specific data points.
Step 8: Generating XML Sitemaps:
Go to the “Sitemaps” tab to generate XML sitemaps. Ensure your sitemaps are updated and submit them to search engines for improved indexing.
Example:
- Visit the “Sitemaps” tab.
- Generate and save XML sitemaps for your website.
Step 9: Integrating Google Analytics and Search Console:
Integrate Screaming Frog with Google Analytics and Google Search Console for enhanced data analysis. Access the “Configuration” > “API Access” to connect your accounts.
Example:
- Go to “Configuration” > “API Access.”
- Connect Screaming Frog to your Google Analytics and Search Console accounts.
Step 10: Save and Export Data:
After completing the analysis, save your project or export the data for further analysis. This allows you to revisit the results or share them with your team.
Example:
- Click “File” > “Save” to save your project.
- Export specific data for reporting or sharing.
Conclusion:
By following these steps and exploring Screaming Frog SEO Spider’s features, you can gain valuable insights into your website’s SEO performance. Regularly use the tool to identify issues, optimize content, and enhance your overall SEO strategy. Screaming Frog SEO Spider’s intuitive interface makes it an excellent choice for beginners diving into the world of SEO analysis.